Glass wall art is getting viral, especially in modern homes. It mixes light, color, and design, creating a special atmosphere. From your living room and bedroom to your office, it brings class, charm, and a modern twist. Still, hanging this type of art needs mindful attention. It would be best if you considered the way it’s mounted, the wall it’s going on, and the unique features of the art. Doing it right keeps the art secure, steady, and looks great too.
This guide is your helper for putting up glass wall art. It covers all you need to know to get it up easily, safely, and in a way that looks great. You’ll learn about getting your tools ready, picking the right way to hang your art, and how to take care of it. With this guide’s steps, hanging your glass art will be a breeze.
Preparing to Hang Glass Wall Art
Getting ready to hang your glass wall art is key. A good plan can help skip errors, put your art just where it should be, and keep it safe from harm.
Choosing the Right Location
Picking a perfect spot for your glass art is important as it enhances its allure. Glass wall art is famous for bouncing off light and creating an amazing spectacle. Thus, lighting is highly influential in the eventual outcome.
- Think about Natural Light: Search for spots with lots of sun. A piece of glass near a window can spread the sunlight and show off its charm. Yet, don’t leave it under the sunlight for too long. UV rays could make the glass lose its color or fade as days pass by.
- Glass Art Lighting: If you’re not getting natural light for your glass art Try using carefully placed spotlights or LED lights. They will make your glass shine brighter and bring all eyes to it!
- Stay Away From Busy Zones: The delicate nature of glass wall art calls for caution. Taking care to hang it away from spots where it could get hit or nudged is a smart move. Think twice before choosing hallways, areas close to doors, or spots that experience lots of people walking by for your beautiful glass artwork.
- Highlight Features: Glass artwork could stand as the main focus in a room. So, think about setting it where eyes naturally go. Like, over the fireplace, on a wall that stands out, or behind a piece of furniture that makes a statement.
Check the Wall Type
- Drywall: It’s what most walls in homes are made of. You’ll need anchors for drywall to securely mount the glass art. Make sure the anchor size matches the weight of your art piece.
- Concrete or Brick Walls: More robust mounting hardware is a necessity for hanging glass art on these sturdy materials. Masonry anchors or screws are ideal. Don’t forget a masonry drill bit to penetrate these tougher walls.
- Wooden Walls: Hanging glass art on a wood wall is simple. Usually, screws inserted directly into the wall studs do the job, securing your artwork effectively.
Gather the Necessary Tools and Materials
Get everything ready before you start putting up your glass wall art. With all you need at hand, you’ll make the job quicker and easier, and dodge unwanted hold-ups.
- Stud Finder: This tool helps find wall studs, the best places to secure things.
- Measuring Tape: This helps you hang your artwork exactly where you want it, both in height and location.
- Level: This tool makes sure your art is straight.
- Drill and Drill Bits: Needed to make the holes where you’ll put things like screws or anchors.
- Mounting Hardware: Choose the right way to mount your art (stand-off mounts, mirror clips, or adhesive hooks) based on the weight and kind of glass art.
- Gloves: Keep your hands safe from anything sharp and keep fingerprints off the glass.
- Pencil or Masking Tape: Use these to mark where you will put the anchors and where things go on the wall.
Selecting the Right Mounting Method
Which way to mount hinges mostly on your glass wall art’s measurements, load, and sensitivity. Let’s dive into each method so you can pick the perfect one for your needs.
Edge-Grip Stand-Off Mounts
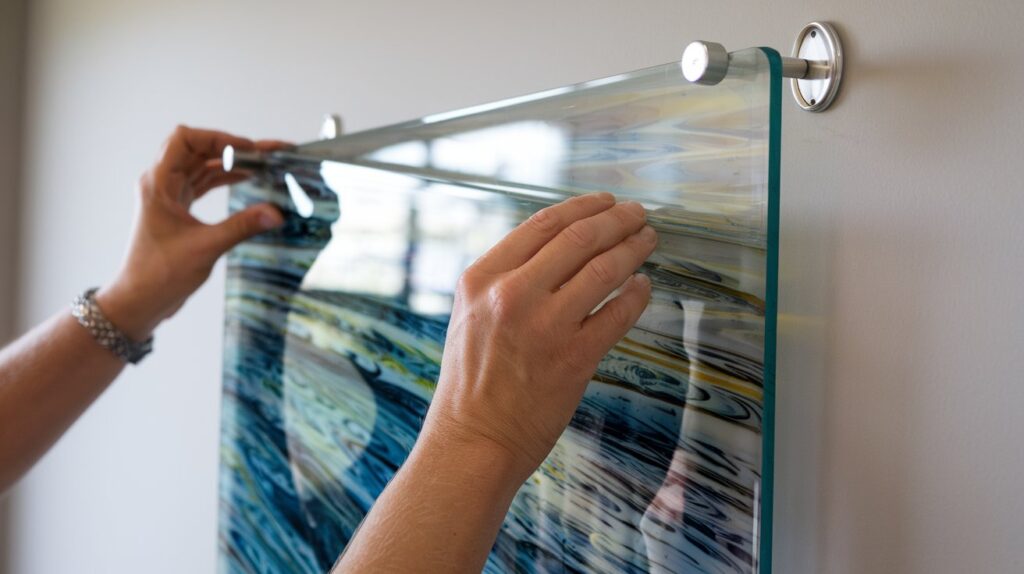
Edge-grip stand-off mounts are frequently picked to suspend thick, hefty glass works of art. They give a contemporary, lifted aesthetic adding layers to your artwork. These mounts are excellent for crafting a neat, proficient appearance while ensuring the glass remains firmly positioned.

Steps for Installation:
- Mark the spot: Using a tape measure and a level, mark where you’ll attach the mounts. Make sure the glass piece’s edge space is equal all around.
- Drill Holes: At the marked spots, drill. If you’re dealing with concrete or brick, a masonry bit would be handy. Add wall anchors if need be.
- Attach the Stand-Offs: Put up the stand-off mounts using screws. Make sure they’re solidly fixed to the wall.
- Place the Glass Art: Push the glass art into the stand-offs you’ve mounted. Softly tighten the screws so the glass stays put. Check its
- Test for Stability: Look to see if the glass art is safe and sound. Make changes if you need to.
Mirror Clips
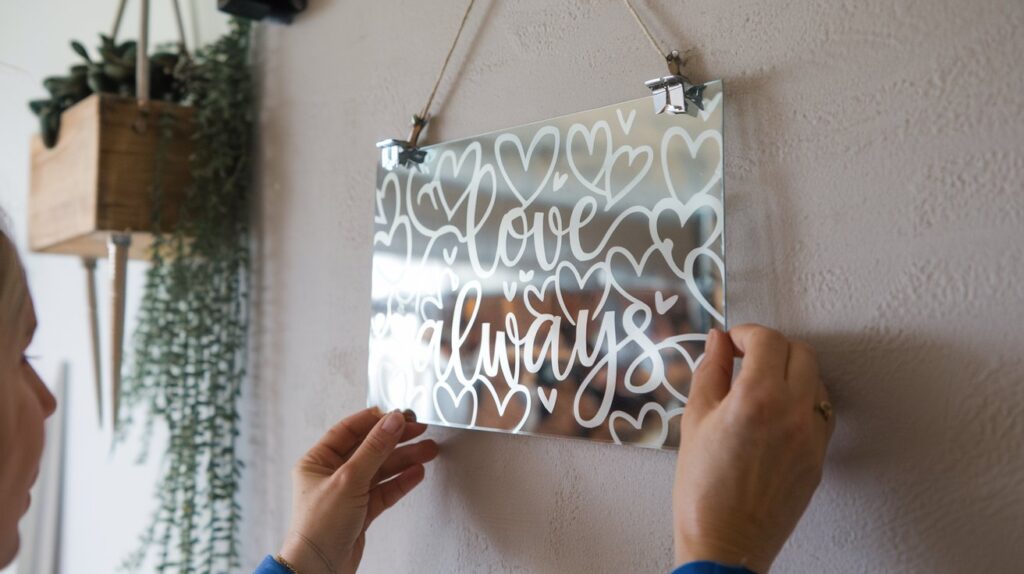
Mirror clips work well for thin glass, typically, 1/4 inch or less. They push the glass snugly against the wall. This is a plain but firm way to mount light-glass artwork.

Steps for Installation:
- Measure and Mark: Put your piece on the wall and make pencil or tape marks where your clips should be, top and bottom.
- Install the Bottom Clips: Drill your holes to place the bottom clips, leaving room for the glass to fit in.
- Install the Top Clips: Now that the glass rests in the bottom clips, install your top ones to keep the art secure.
- Tighten the Clips: Make sure clips are tight but not overly so – too much pressure might damage your glass.
Adhesive Hooks or Friction Mounts
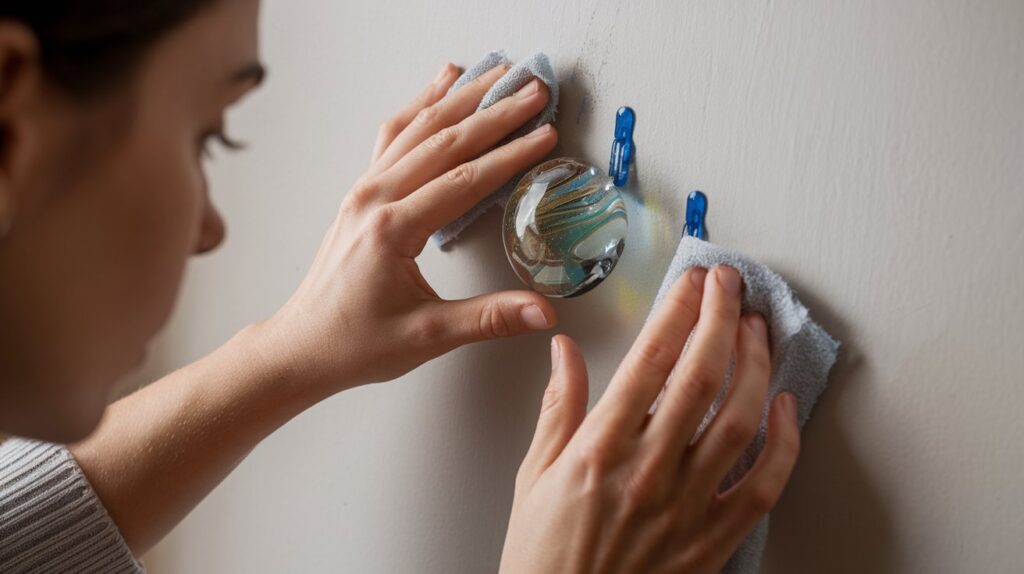
Sticky hooks or friction holders work well for light or short-term setups. They’re handy, especially if you’re looking to show off mini glass artworks or fix glass onto window panes. Sticky hooks can be put up and taken down with ease, leaving no scars behind. This makes them great for people renting homes.

Steps for Installation:
- Clean the Surface: Make sure the spot where you’re planning to put up your art is clean. This helps with sticking.
- Get Set With Sticky Hooks: Pay attention to the guidelines provided by the maker when fixing the sticky hooks to your wall.
- Position the Art: Be careful when you put the glass on the hooks. Double-check that it’s balanced and in the right place.
- Ensure It’s Secure: Give the hooks a gentle pull to see if they’re holding the glass tight.
Choosing the Best Method
Picking the best way to hang your glass wall art? Think about how heavy and delicate it is. For the bigger, thicker pieces, you can’t beat edge-grip stand-off mounts. Smaller, thinner ones? Mirror clips or adhesive hooks should do. No matter your choice, let’s not forget about keeping it steady and safe.
Safety Tips When Hanging Glass Wall Art
Putting up glass wall art asks for extra attention to avoid harm to the artwork or yourself. Heed these safety pointers for a smooth and safe setup:
- Don’t Forget Gloves: Keep your hands safe from anything sharp, and prevent fingerprints on the glass with gloves.
- Choose Correct Anchors: Heavier glass pieces need the right anchors and screws. This helps keep your art from falling.
- Avoid High-Traffic Areas: Hanging your glass art where people often walk or bump can lead to accidents. Consider safer spots.
- Ensure Firm Attachment: Before leaving the area, check to see if your glass art is firmly fixed to the wall.
Conclusion
Hanging up wall art can be a fun task if done right. With proper tools, methods, and safety measures, you can make a wonderful showcase that boosts any room’s charm. Try stand-off mounts, mirror clips, or sticky hooks, and follow this guide. Your glass art will remain firmly in place, adding grace to your house or workspace.
Don’t forget, the secret to a good setup is preparation, the correct mounting technique, and stability double-checks. Get ready to enjoy the striking look your fresh glass art brings to your area!

